HiBy RS2II User Manual
Welcome to HiBy Music products
Thank you for purchasing the HiBy RS2II portable high-definition lossless music player. To help you get the best experience from the RS2II, this document introduces the RS2II's common functions and operation methods, and we hope it helps you understand and use the RS2II more comprehensively.
You are also welcome to visit the HiBy official website at www.hiby.com to learn more about HiBy products and purchase related products.
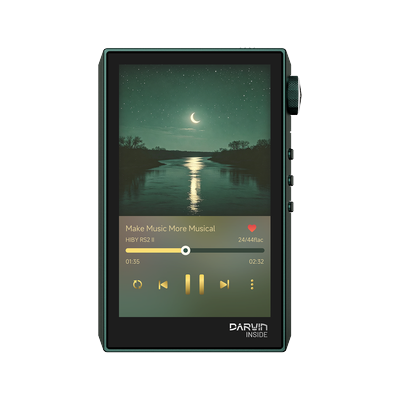
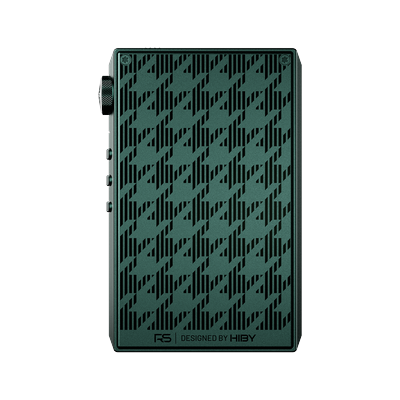
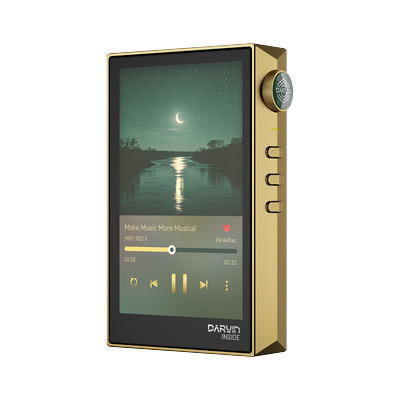
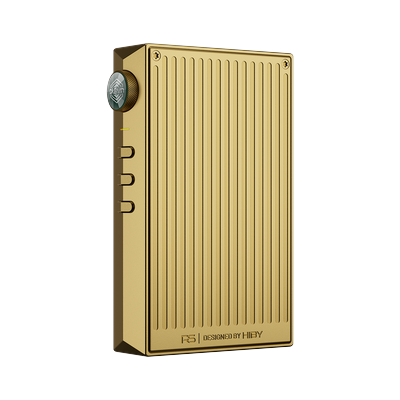
1. Product Introduction
- It uses HiBy OS, the Ingenic X1600E main control chip, and the Darwin III audio architecture, supporting up to PCM 384 kHz/32 bit, DSD256, and MQA 8× unfolding.
- It provides 3.5 mm single-ended and 4.4 mm balanced headphone outputs. Both interfaces can be switched to Line Out (LO) in the settings.
- It provides USB DAC input, USB audio output, USB OTG, and S/PDIF output through the USB interface.
- It is equipped with dual MicroSD (TF) card slots and supports FAT32, exFAT, and NTFS file systems.
- It does not provide wireless functions.
The following introduction uses the view facing the player screen as the front view:
- The body has a customizable function key, a 3.5 mm headphone jack, and a 4.4 mm headphone jack.
- The volume knob can be rotated to adjust the volume; pressing the knob can control power and the screen.
- There are also a sample rate indicator light, previous track/rewind button, play/pause button, and next track/fast-forward button.
- The body has dual MicroSD card slots and a USB Type-C interface.
2. Button Usage Instructions
Button Layout and Functions
| Button | Short press or rotate | Long press | Press for more than 10 seconds |
|---|---|---|---|
| Power/volume knob | Press: turn screen on or off; rotate: adjust volume | Press: power on or off | Press: hardware reset or forced shutdown |
| Previous track | Play previous track | Rewind | — |
| Play/Pause | Toggle playback status | — | — |
| Next track | Play next track | Fast-forward | — |
| Fn customizable function key | Execute the set function or key lock | Execute the set function or key lock | — |
- Force enter upgrade interface: While powered off, press and hold the Previous Track button, then press the Power button to power on. Before entering the upgrade interface, first place the rs2ii.upt file applicable to the RS2II into the MicroSD card. This key combination comes from the RS2II specification; do not use the key combination for RS2.
3. Interface Usage Instructions
Audio Output Interfaces
- 3.5 mm: Defaults to single-ended headphone output (PO); can be switched via software to 3.5 mm Line Out (LO).
- 4.4 mm: Defaults to balanced headphone output (BAL); can be switched via software to 4.4 mm Line Out (LO).
- The line output volume may differ from the headphone output. Before switching to line output, first unplug the headphones, then connect the corresponding external device.
USB Interface
The USB Type-C interface supports USB 2.0 and OTG. It can be used to connect external storage devices, receive digital audio as a USB DAC, output audio to external USB decoding devices, and output S/PDIF digital audio. The specific working mode is selected in the device's USB-related settings.
Charging Interface
Charge through the USB Type-C interface. The adapter input given in the RS2II specification is 5 V/2 A; the charging current is adjusted according to temperature. Please use a charger that meets the device requirements.
MicroSD (TF) Card Interface
The dual MicroSD card slots are used to store music and upgrade files. The maximum TF card capacity given in the specification is 2 TB, and hot swapping is supported. The supported file systems are FAT32, exFAT, and NTFS.
LED Indicator
| Status | Color |
|---|---|
| Charging | Red |
| Standby | Off |
| Not playing music | Light blue |
| Playing music (≤ 48 kHz) | Yellow |
| Playing music (88.2–192 kHz) | Cyan |
| Playing music (≥ 352.8 kHz) | Orange |
| DSD | White |
| MQA | Green |
| MQA Studio | Blue |
| MQA Rendering | Magenta |
When charging, the red light uses a breathing effect to indicate the charging status; the specification states that the sample rate indicator does not light up when charging and playing.
4. Getting Started
First Power-On
- Insert a MicroSD card containing music into the card slot.
- Press and hold the power/volume knob to power on, and follow the on-screen prompts to complete the initial setup.
- Enter the music interface, scan the songs on the MicroSD card, and start playback.
Status Bar
The status bar is used to view volume, output status, playback status, and battery information. The actual displayed items are subject to the device's current firmware interface.
Main Interface
The main interface provides entries such as Music, Playback Settings, System Settings, and About. Sound effect options such as Darwin and MSEB can be accessed from the corresponding menus.
Shortcut Operations
In System Settings > "Shortcut Menu", you can choose the pull-up or pull-down method and set commonly used functions. In Playback Settings, you can adjust items such as NOS, output selection, and gain.
5. Music
Music Interface
- At the top are respectively: return to the previous level, music search, and favorites category.
- Tap the corresponding icon to enter the corresponding function.
- The music module includes list entries by all songs, folders, albums, artists, genres, album artists, and other information.
Importing Local Music
Because the player itself does not have built-in storage, users need to prepare a MicroSD (TF) card, or purchase a bundle product that includes a MicroSD (TF) card.
Importing Music via MicroSD (TF) Card
Insert the MicroSD (TF) card containing songs into the player's MicroSD (TF) card slot. The player supports file formats such as FAT32, exFAT, and NTFS.
Importing Music via USB
The player supports connecting to a computer via USB and then using the MassStorage protocol to transfer files. The following is a brief introduction. For more information about MassStorage, please refer to here.
The following briefly explains using MacOS and Windows:
MacOS supports FAT and exFAT, but does not support NTFS. Therefore, if you use the NTFS file system, you need to install third-party drivers to use it. The following two options are currently available:
Applications
If you are a MacOS user, it is recommended that you back up your disk files and then format the disk as exFAT for use, which can provide better file compatibility.
You can try the following operations:
- Confirm that the USB cable connection is normal.
- After confirming that the USB cable is properly connected, confirm that USB is currently using the USB storage protocol.
- Restart the computer and try again.
- Restart the player and try again.
Playback Interface
Swipe right across the entire interface to exit the playback interface and return to the song list interface or the main interface.
- The center shows the cover art and lyrics interface. Tap it to switch the lyrics display.
- The star button on the left side of the center can be tapped to add the song to the My Favorites list.
- The progress bar at the bottom is used to display playback progress, and you can also quickly jump to the current song's progress.
- The bottom buttons are, in order, playback mode, previous track, play/pause, next track, and function menu.
- Playback mode button functions:
- List playback: Starts from the selected track and stops after the current list finishes playing.
- Single repeat: Repeats the same song continuously until you manually switch tracks or power off, then stops.
- Shuffle: Randomly selects the next song in the current list to play until you manually stop or power off, then stops.
- List loop: Starts from the selected track and continuously loops through the songs in the current list until you manually stop or power off, then stops.
- Function menu button functions:
- Current playlist
- Add to playlist
- Jump to equalizer
- View album
- View detailed song information
- Delete
- Supported formats: png, jpg, jpeg, bmp.
- Supported resolution: in principle, no more than 1024*1024 (pixels).
- Supports embedded song covers.
- Supports external covers.
- Priority: image with the same name as the song file > image named folder > image named cover > image named front > embedded image in the song.
Tap the upper half of the screen to switch to the lyrics display.
- Lyrics only support the lrc format.
- Lyrics must be in the same directory as the song.
- The lyrics file name must be the same as the song file name.
- Supports embedded lyrics.
- Lyrics encoding formats support UTF-8, UTF-16, and other encodings.
- For locally encoded lyrics, there may be compatibility issues. You can try switching to the machine language that matches the lyrics encoding.
6. Darwin
-
What is Darwin? The Darwin architecture is HiBy's independently developed new high-definition audio processing architecture. It is derived from traditional R2R technology and integrates R2R resistor network linear technology. It innovatively applies functions such as adjustable pure FIR filters, harmonic controller, NOS/OS switching, and DSD bypass to portable playback devices. At the same time, its flexible architecture design is fully independently controllable throughout the entire process, creating unlimited possibilities for later upgrades and iterations, giving devices that use it room for continuous evolution.
-
Digital filter modes Used to select different digital filters, providing different listening experiences.
-
NOS
- Non OverSampling is a method used for digital-to-analog conversion, in which the audio signal is converted directly from its digital form to an analog signal without going through the oversampling process. To fully understand NOS, you must first master the basic concepts of digital-to-analog conversion and oversampling.
- In digital-to-analog conversion (DAC), a digital audio signal composed of discrete samples is converted into a continuous analog signal, which can be amplified and played through speakers or headphones. This process is essential for converting digital audio data into sound that can be heard and enjoyed.
- On the other hand, oversampling involves increasing the sampling rate of the audio signal beyond the original sampling rate. This technique aims to reduce distortion and noise by averaging multiple samples, which theoretically can improve conversion quality. Oversampling is commonly used in modern DACs to improve performance and accuracy.
- NOS DACs skip this extra step. These DACs do not perform oversampling, but instead convert at the original sampling rate of the audio signal. This approach can bring a different audio experience, often characterized by its unique sound quality.
-
Harmonic controller
- The harmonic controller mainly adjusts the second harmonic, because generally speaking, the human ear prefers even-order harmonics; compared with even-order harmonics, odd-order harmonics sound harsher and less harmonious.
-
The RS2II uses a Darwin III audio architecture based on R2R. The device resources provide setting entries such as digital filter mode, NOS, and harmonic control, which can be adjusted according to listening preferences. The specific selectable items are subject to the current firmware display.
7. MSEB
The top area is respectively reset MSEB, MSEB settings entry, and MSEB switch.
- Swipe up and down to display more adjustment items.
- Swipe left and right to adjust the settings of the corresponding item.
- MSEB is only effective for songs not higher than 96 kHz.
- It is ineffective for both DSD and MQA songs.
8. Playback Settings
-
Equalizer (EQ) The top area is respectively reset equalizer, preset equalizer menu entry, and equalizer switch.
- Swipe left and right to display different equalizer bands.
- Swipe up and down on the slider of different bands to adjust the gain/attenuation dB value of the corresponding band.
- Draw the corresponding curve according to the adjustment position of different bands.
- The equalizer is only effective for songs not higher than 48 kHz.
- It is ineffective for both DSD and MQA songs.
-
Song scan Manually start scanning songs.
-
Scan music mode
- Manual: the user needs to manually update the song library.
- Automatic: when the insertion or removal of a MicroSD (TF) card or USB is detected, the system automatically rescans the song library.
-
Playback mode
- List playback: Starts from the selected track and stops after the current list finishes playing.
- Single repeat: Repeats the same song continuously until you manually switch tracks or power off, then stops.
- Shuffle: Randomly selects the next song in the current list to play until you manually stop or power off, then stops.
- List loop: Starts from the selected track and continuously loops through the songs in the current list until you manually stop or power off, then stops.
-
Output selection
- Because PO/LO reuse the same output port, this option is used to switch between PO/LO output.
-
DSD output mode
- When the audio output is balanced (BAL), single-ended (PO), or LineOut (LO), DSD output mode cannot be selected. This function is ineffective, and output is based on the actual situation.
- When the audio output is Bluetooth, DSD output mode cannot be selected. This function is ineffective, and everything is converted to PCM output.
- When the audio output is SPDIF, DSD output mode can be selected. If PCM is selected, output at a sample rate of 88.2 kHz. If DoP or Native is selected, when playing DSD64, both output in DoP mode, with an output sample rate of 2.8 MHz. If DoP or Native is selected, when playing DSD128 or DSD256, both are converted to PCM output, with an output sample rate of 88.2 kHz.
- When the audio output is USB Audio Out, DSD output mode can be selected. If PCM is selected, output as PCM, with a maximum supported sample rate of 384 kHz. If DoP is selected, output as DoP, with a maximum supported DSD256 (11.2 MHz) (condition: the connected decoding device must support DSD decoding; if the device does not support it, playback fails). If Native is selected, output as Native, with a maximum supported DSD256 (11.2 MHz) (condition: the connected decoding device must support DSD decoding; if the device does not support it, playback fails).
-
DSD gain compensation Because DSD audio is somewhat lower than PCM, you can adjust a certain amount of compensation as needed to make DSD and PCM at the same output level.
-
Power-off memory playback When enabled, if the device is powered off during playback, the next time it is powered on, it will automatically record the previously played song and continue automatic playback.
-
Gapless playback When enabled, two songs are seamlessly connected.
-
Maximum digital volume output Sets the maximum value of digital volume when outputting digitally (S/PDIF, USB Audio Out, Bluetooth Audio Output).
-
Maximum volume limit Sets the maximum output volume when outputting from the local output ports (single-ended and balanced output).
-
Default volume at power-on Sets the output volume of the local output ports (single-ended and balanced output) each time the device is powered on.
-
Fade in/out When enabled, when a song starts and stops playing, the sound goes from low to normal, or from normal to none.
-
Gain setting Sets the player's high and low gain.
-
Replay gain If the song's information contains replay gain information, this option is effective. If track or album replay gain is selected, each song or each album will be adjusted according to the song's replay gain parameters, thereby keeping the actual volume of different songs at the same level without changing the system volume.
- Off: Ignore replay gain information in the song.
- Track: Adjust gain according to the track replay gain information in the song.
- Album: Adjust gain according to the album replay gain information in the song.
-
Channel balance Sets the left and right channel volume.
-
Folder track skip
- Folder track skip can prevent users from repeatedly listening to songs in the same directory.
- When a song finishes playing, if the song is the last song in the current directory list, switching tracks will return to the previous directory. If the parent directory has other directories, it will enter the next directory under the current directory and play according to the list; otherwise, it will continue to search for the next directory in the parent directory.
- If no other directory or song is found, it will continue to return to the previous directory and repeat this process until the last song under the root directory is found.
- List playback, shuffle, and sequential playback can all use the folder track skip function. When folder track skip occurs, the playback mode logic is ineffective.
- When the playback mode is single repeat, the function is ineffective during automatic track switching.
-
Album track skip
- When playing in album list mode, after one album finishes playing, it will jump to another album for playback.
- When the playback mode is single repeat, the function is ineffective during automatic track switching.
-
Auto-scroll to playlist
- After turning on the switch, tapping a song in the list will directly enter the playlist interface.
9. System Settings
-
Language selection Select the current system language as needed.
-
Backlight brightness Set different backlight brightness levels.
-
Backlight time Set the time for automatically turning off the backlight.
-
Colorful theme After turning it on, you can choose different colors as the device's main color tone.
-
Font size Set the font size. If the current font is not suitable, you can adapt to your needs by selecting different font size options.
-
USB mode When the player is used as a USB device, you can switch functions through this option.
-
USB DAC feedback If the connected device cannot be used, you can try changing this option.
-
Time setting Modify the player's current time.
-
Power-saving shutdown After turning on the switch, when the player is not playing, HiByLink, Bluetooth, and Wi-Fi also have no audio data transmission, and USB is not connected, the device will shut down when the power-saving shutdown time is reached to save power.
-
Sleep shutdown
- After turning on the switch, when the sleep time is reached, if USB is not inserted, the device will unconditionally shut down; if USB is inserted, it will enter the charging interface.
- This function is one-time effective. After the next power-on, the sleep shutdown function becomes ineffective and needs to be turned on again.
-
Battery percentage display After setting, the battery percentage will be displayed next to the battery icon.
-
Standby Used to turn on the automatic standby function.
-
Indicator light
- Indicator light switch. It can be turned off at night to avoid light pollution.
- When charging, the red light breathes.
- When not charging, the blue light indicates operation.
-
Double-tap to wake Used to support double-tapping the screen to wake. If there are too many accidental operations, please turn off this function.
-
Button operations when screen is off Whether to support operations when the screen is off, to avoid accidental operations when placed in a pocket or other places.
-
Volume knob operation when screen is off Whether to support operations when the screen is off, to avoid accidental operations when placed in a pocket or other places.
-
Shortcut menu Set shortcut menu functions.
-
Screensaver settings
- Set the screensaver display method. You can choose Off, Album Cover, or Dynamic Cover.
- Album Cover: Display the cover of the currently playing song.
- Dynamic Cover: Create a
screensaversfolder in the root directory of the Micro SD (TF) card, and put images into that directory. Supports jpg, png, and other formats. It is recommended that the resolution not exceed 1024*1024. It is recommended that the number of images not exceed 16.
-
Screen rotation Supports rotating the screen 180 degrees for display.
-
Restore factory settings Restore factory settings.
-
System upgrade
-
TF card upgrade Copy the downloaded
*.uptupgrade package to the root directory of the Micro SD (TF) card, and select TF card upgrade. -
Network upgrade After tapping, the system will automatically detect whether there is the latest firmware on the server, and then operate according to the prompts.
-
What if the player cannot be powered on and needs to be upgraded?
- Using a card reader or another device that can read the card, copy the downloaded
*.uptupgrade package to the root directory of the Micro SD (TF) card. - While powered off, press and hold the Play/Pause button and the Power button at the same time. The system will power on and automatically enter upgrade mode.
- Using a card reader or another device that can read the card, copy the downloaded
-
10. About
-
Brand Displays the HiBy brand logo.
-
Model, firmware version Displays player version information.
-
Storage capacity Displays current storage capacity information, including used capacity and total capacity.
-
Other information Product support contact information, official website, serial number, and other platform contact information. Tapping will pop up a QR code that can be scanned directly.
-
Firmware build time Displays the build time of the current firmware.
11. USB Audio
USB Audio Guide
When the player works in USB audio mode, it can be regarded as a USB high-definition decoding receiver or a USB sound card. When the player works in USB audio mode, it supports the USB Audio Class 2.0 (UAC2) protocol, but does not support USB Audio Class 1.0 (UAC1). Therefore, the host side also needs to support USB Audio Class 2.0 (UAC2).
Different host systems have different power supply methods, so USB DAC provides two working modes:
-
USB charging (toggle switch kept in the middle state) After selecting this mode, the current provided by the host is not only used for the player to work, but also charges the player. Therefore, it is recommended to select this mode in scenarios where the host power supply current is large, such as when the host is a computer.
-
USB not charging (toggle switch moved to the locked charging state) After selecting this mode, the current provided by the host is only used for the player to work. Therefore, it is recommended to select this mode in scenarios where the host power supply current is small, such as when the host is a mobile phone.
Different host systems have certain differences in their support for USB Audio Class 2.0 (UAC2). Please confirm the support situation according to the corresponding system. For details, please jump to here. A brief reference is provided below:
-
Windows Windows (Win7/Win8/Win10 versions before 1703) does not support the USB Audio Class 2.0 (UAC2) protocol, so a driver needs to be installed to use it. For driver installation, please refer to here. Windows (Win10 version 1703 and later) supports the USB Audio Class 2.0 (UAC2) protocol, plug and play. When the computer uses external power supply, it is recommended to use USB DAC mode (charging). When the computer uses battery power, it is recommended to use USB DAC mode (not charging).
-
MacOS MacOS itself already has a driver. Connect the player and the MacOS computer via a USB cable to use it. When the computer uses external power supply, it is recommended to use USB DAC mode (charging). When the computer uses battery power, it is recommended to use USB DAC mode (not charging).
-
Linux distributions Linux support for USB DAC is determined by the kernel. Whether the USB sound card function is enabled in the kernel of different distributions is uncertain. For Linux distributions that do not support USB DAC, you can compile the kernel yourself to implement the USB sound card function. Or find third-party applications to support USB DAC function. When the computer uses external power supply, it is recommended to use USB DAC mode (charging). When the computer uses battery power, it is recommended to use USB DAC mode (not charging).
-
Android Android distinguishes between exclusive and non-exclusive methods.
Android non-exclusive use Directly insert a USB decoder (such as HiBy FC4/HiBy FC6) into the phone's USB port to use it. If there is no response after insertion, you can download HiBy Music and try HiBy Music's exclusive mode. Otherwise, the phone does not support it. Please contact the phone manufacturer to confirm.
Android exclusive use Download and install HiBy Music (HiByMusic). Enter HiBy Music -> swipe right, open the settings option -> Settings -> tap HiBy Music exclusive USB output, turn on exclusive output. Directly insert the USB decoder (such as HiBy FC4/HiBy FC6) into the phone. The phone will pop up "Allow HiBy Music to access HiBy FC4". Tap Allow.
It is recommended to use USB not charging to save phone or tablet battery.
-
iOS iOS itself already has a driver. Connect the player and iPhone/iPad via a USB cable to use it. It is recommended to use USB not charging to save phone or tablet battery.
-
Game consoles So far, game consoles such as XBOX/PS/Switch only support USB Audio Class 1.0 (UAC1), so the player's USB audio function cannot be used through game consoles.
12. FAQ
- For common questions, please go here