HiBy RS6 manual
Welcome to use HiBy Music’s products
Thank you for purchasing the RS6, a portable high-definition lossless music player launched by HiBy. In order to bring you a better experience with RS6, this article introduces the common functions and operation methods of RS6, hoping to help you understand and use RS6 more comprehensively.
At the same time, you are also welcome to visit the official website of HiBy Music (HiBy) www.hiby.com to learn more about HiBy Music (HiBy) products and purchase related products.
1. Product introduction
- Based on Android9.0 system, using Qualcomm Snapdragon 660 main control, with 4G running memory and 64GB internal storage
- Adopts Hiby's own Darwin decoding architecture, supporting up to DSD256 and PCM 768kHz decoding
- Support PhoneOut(PO), LineOut(LO), Balance and Balance LineOut analog audio output
- Support coaxial (S/PDIF) output
- Support Bluetooth audio output (support UAT, LDAC, aptX HD, aptX, AAC, SBC and other encodings)
- Support USB audio output
- Support MQA 16x expansion
- Supports external MicroSD(TF) card up to 2TB
- Supports Bluetooth 5.0 and 2.4G and 5G dual-band WiFi
- Supports PD2.0 fast charging protocol, supporting up to 18W power charging
- Support local playback, Bluetooth decoding, USB decoding, etc.
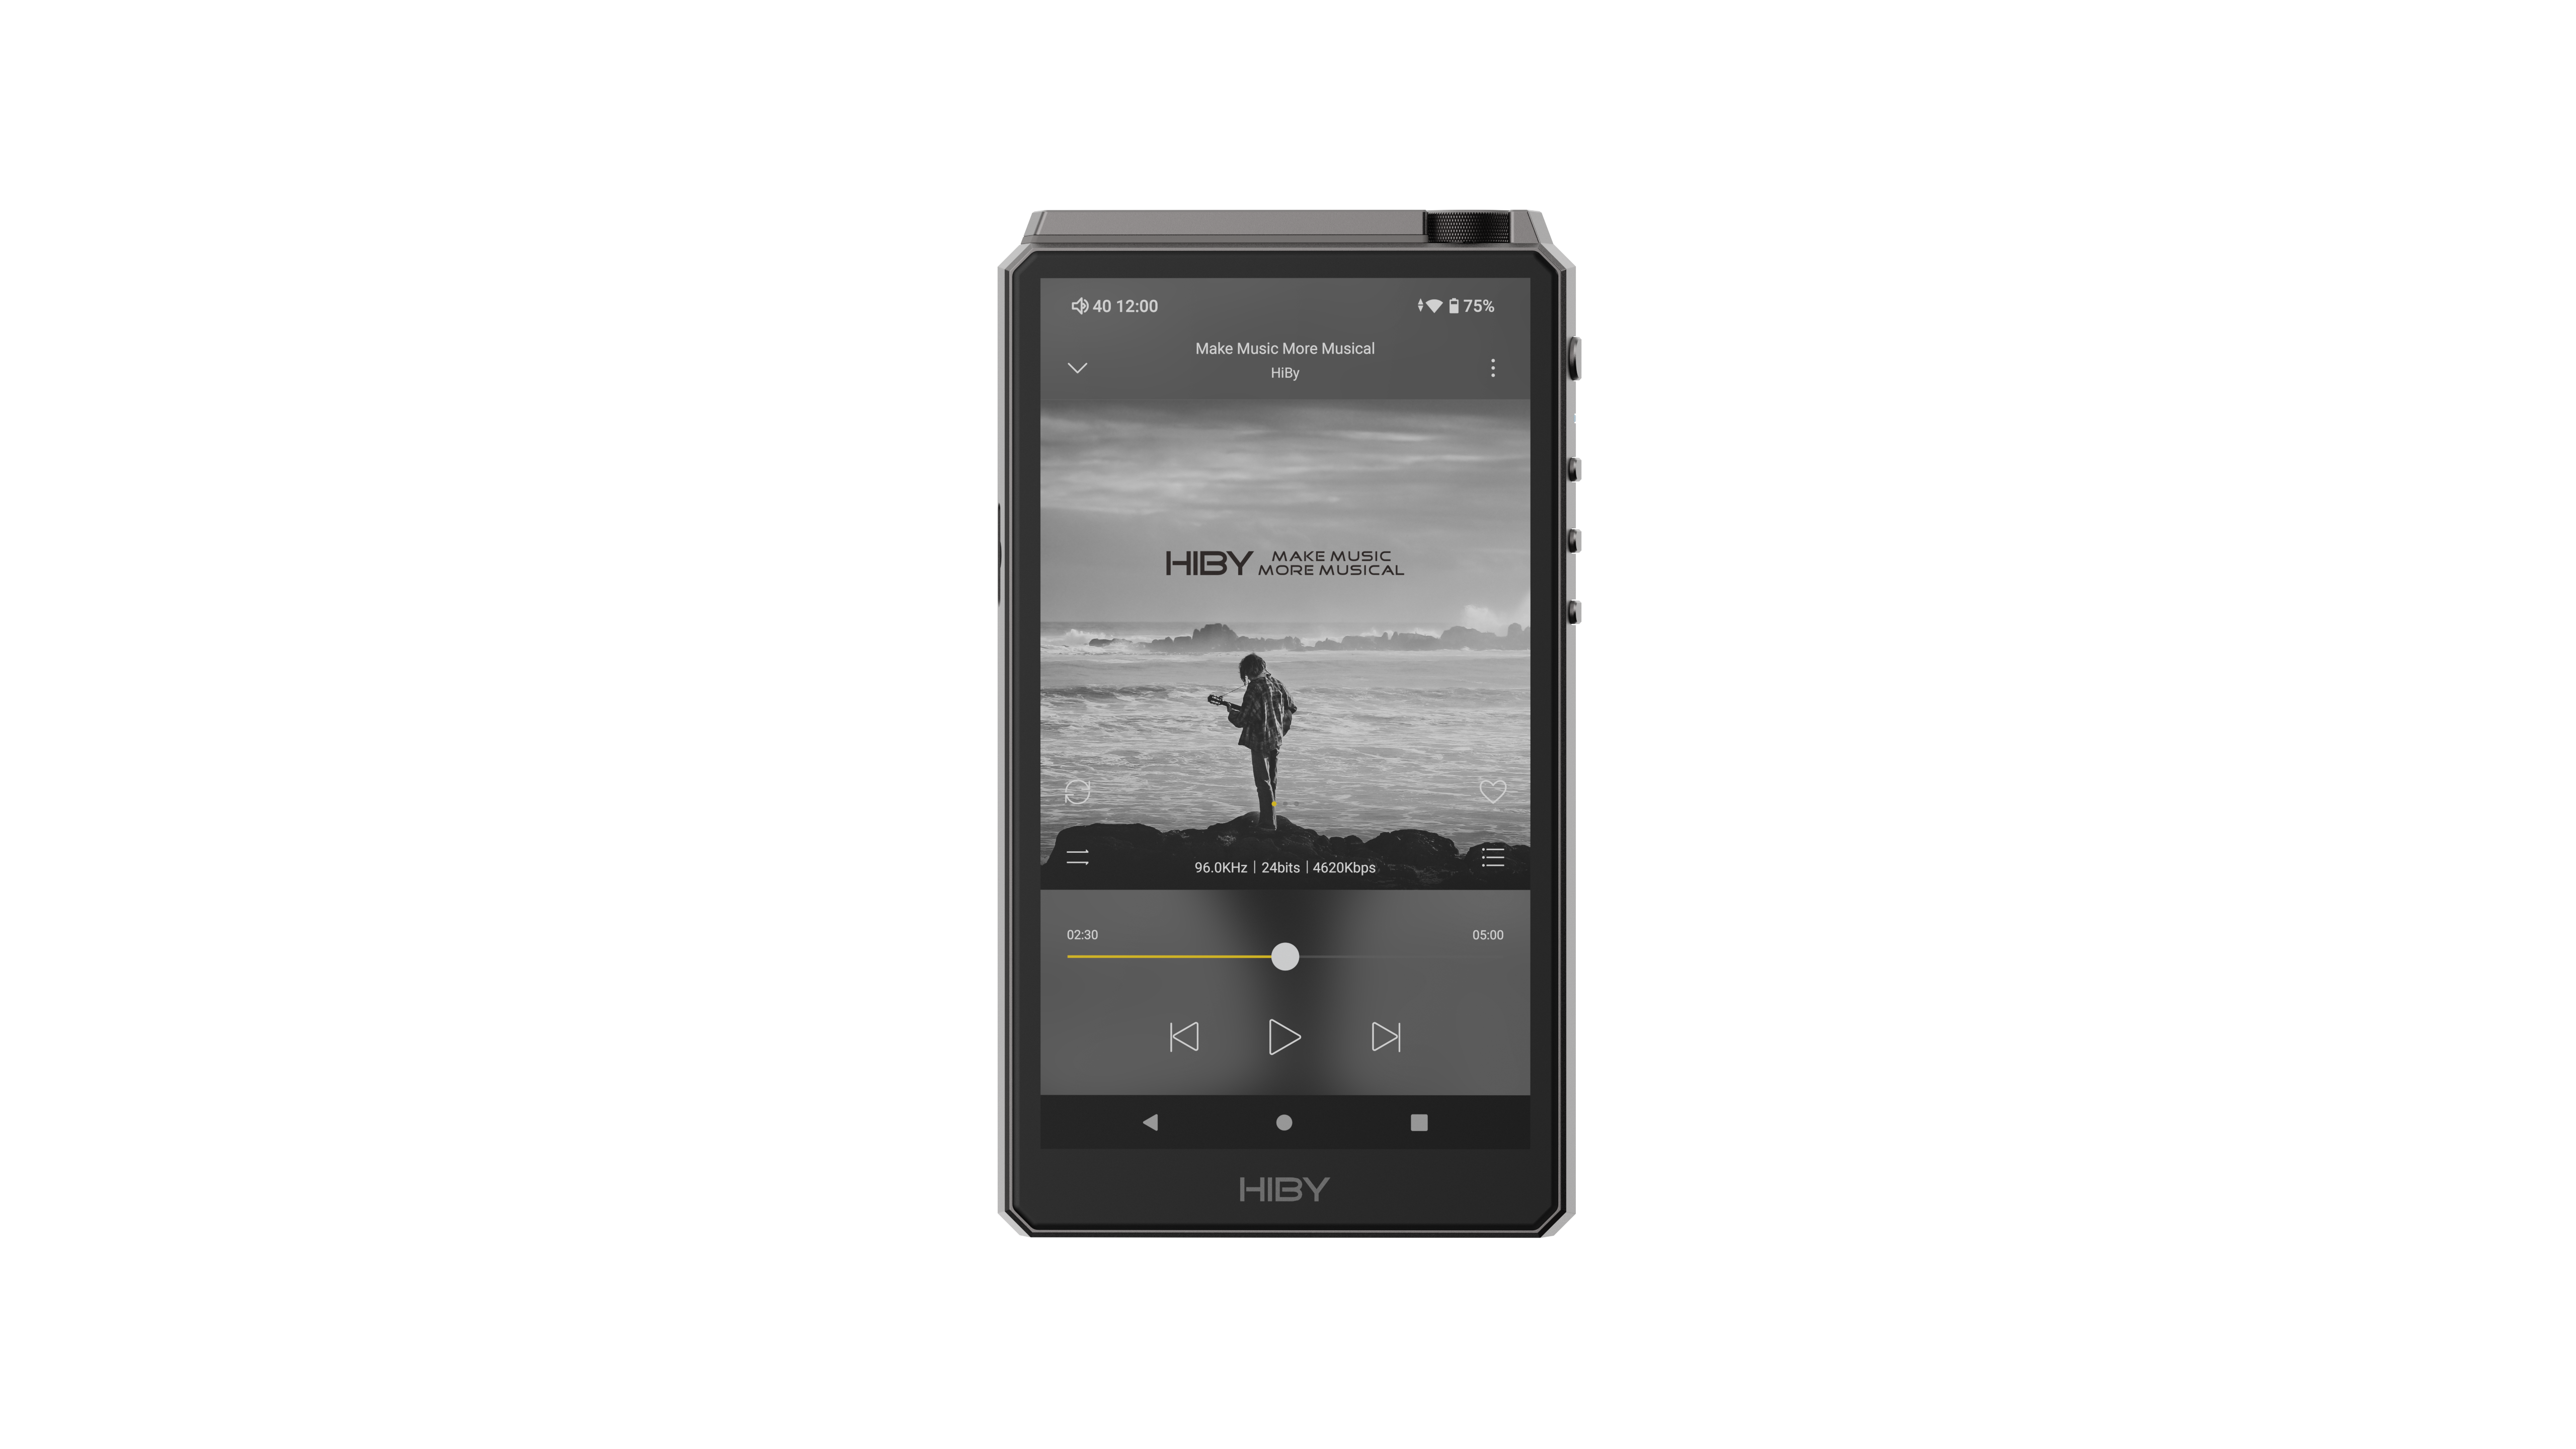
The following introduction is based on the front view of the player screen:
- On the right side of the top is the volume knob
- The right side from top to bottom is: power button, LED indicator light, previous song, playback pause, next song
- The left side is the MicroSD(TF) card slot
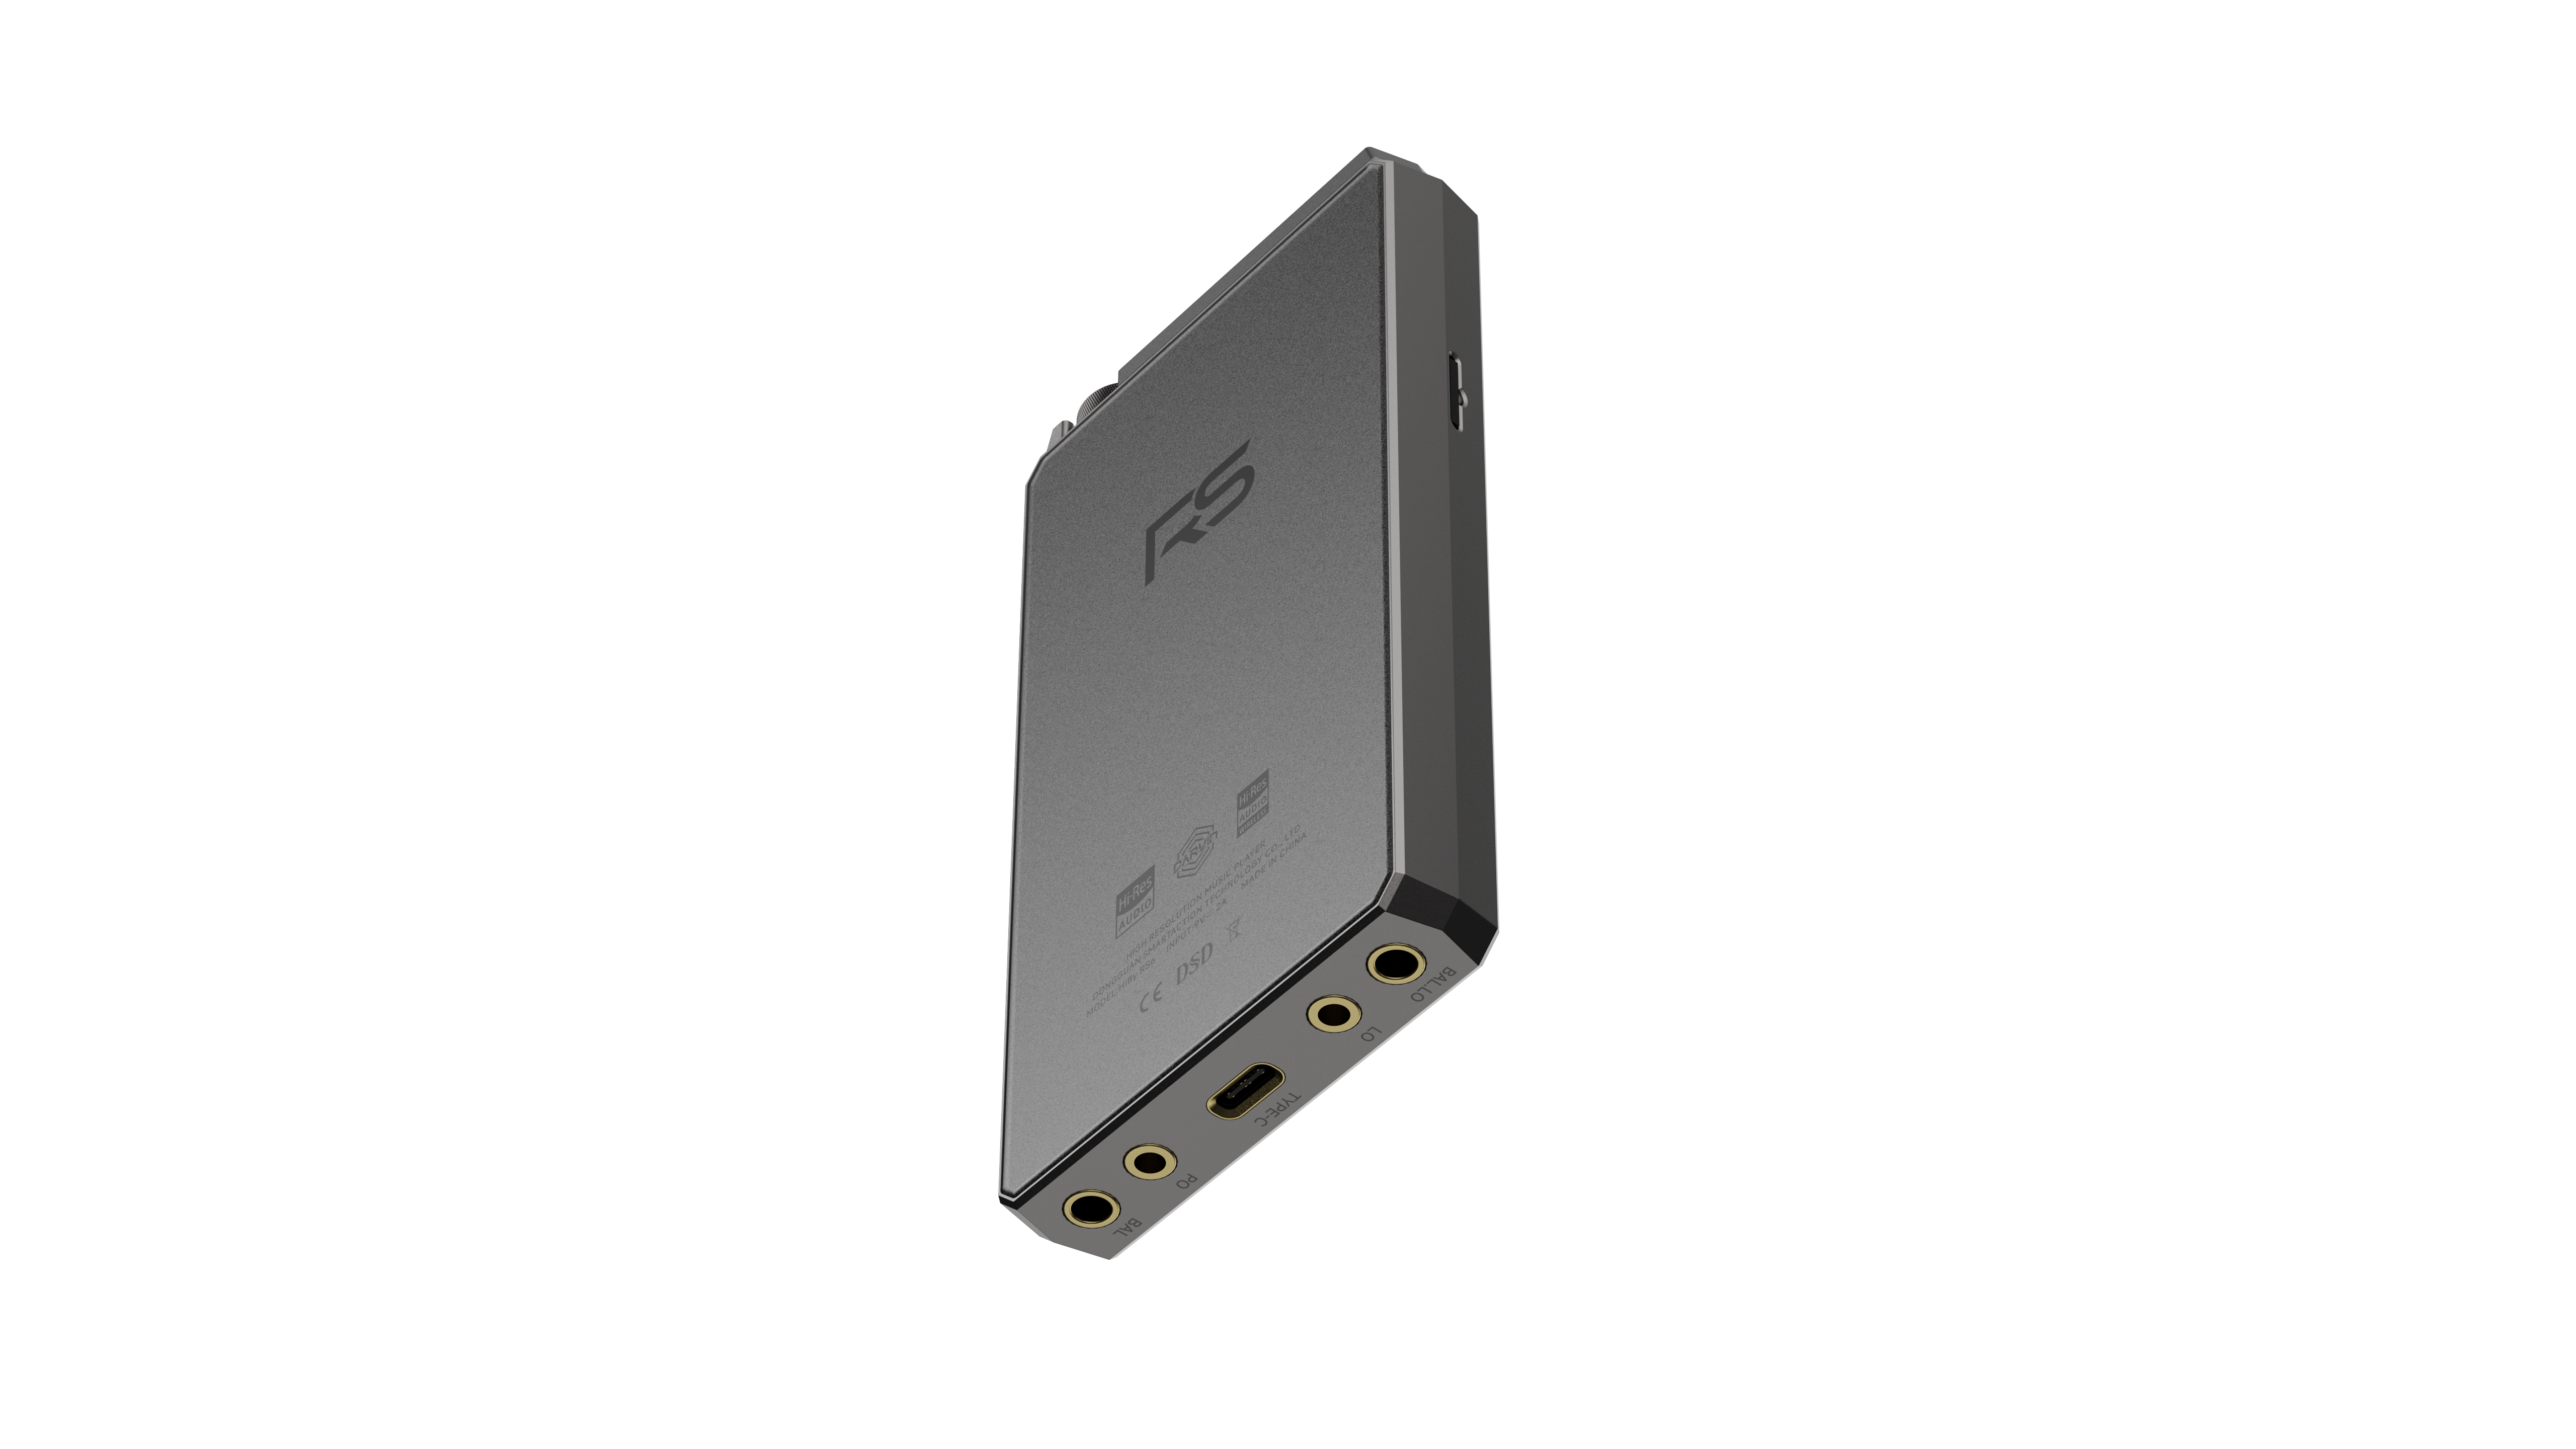
- The bottom from left to right is: BAL, PO, Type-C, LO, BAL.LO
2. Button usage instructions
The following introduction is based on the front view of the player screen:
- On the right side of the top is the volume knob
- The right side from top to bottom is: power button, LED indicator light, previous song, playback pause, next song
| Button | Function |
|---|---|
| Power button | Long press: turn on and off the phone; short press: turn on and off the screen |
| Previous song | Short press: Previous song |
| Next song | Short press: Next song |
| Pause play | Short press: Pause play |
| Volume knob | Rotation: increase or decrease volume |
| Power button + next song | Press and hold simultaneously for more than 10s: hardware reset |
| Press and hold the previous song to boot | Used to enter recovery mode, see the detailed operation recovery 模式操作 |
In recovery mode, you can clear system data and upgrade without entering the system.
- Press and hold the previous song to turn on the phone, and a robot interface will be displayed.
- In this interface, press and hold the power button and click to pause play and enter recovery mode.
- The play pause button and next song button are used to make selections, and the power button is used to confirm.
3. Interface usage instructions
The following introduction is based on the front view of the player screen:
- The left side is the MicroSD(TF) card slot
- The bottom from left to right is: BAL, PO, Type-C, LO, BAL.LO
Audio output interface
The audio output interface can be used by different audio devices, such as: headphones with a 3.5mm interface, headphones with a 4.4mm balanced interface, lines with a 3.5mm interface, balanced input amplifiers with a 4.4mm interface, and other devices.
- PO: 3.5mm single-ended interface headphone output
- LO: 3.5mm single-ended interface line output
- BAL: Headphone output of 4.4mm balanced interface
- BAL LO: Line output with 4.4mm balanced interface
USB interface
The physical interface used by the USB interface is the Type-C interface, through which the following functions can be provided.
The player allows USB to work in two different modes:USB OTG and USB 设备。
When the player acts as USB OTG When used (can be understood as USB on the computer):
- Connect U disk or mobile hard disk: read data from U disk or mobile hard disk;
- Connect USB decoder or USB tail: output high-definition audio data;
- Connect to a wired network card: access the Internet through a wired network;
Coaxial signal interface
The physical interface used by the coaxial signal interface is the Type-C interface, and the protocol used for the transmitted audio signal is the S/PDIF interface protocol. High-standard audio digital signal output can be provided through this interface.
Charging interface
The physical interface used by the charging interface is the Type-C interface, and charging can be achieved by connecting the charger through this interface.
- Charging supports PD fast charging protocol. For PD fast charging, please use standard PD fast charging head and standard C2C cable.
- Charging also supports ordinary charging heads, which can reach a maximum charging current of 5V@2A.
MicroSD(TF) card interface
The MicroSD(TF) card interface is used to insert MicroSD(TF) cards, mainly to expand storage capacity. Hishell Player can support MicroSD (TF) cards up to 2TB, and the file systems supported by the player include FAT32\exFAT\NTFS.
LED indicator
| Status | Color |
|---|---|
| Normal | Light Blue■ |
| Normal charging | Red breathing effect (normal)■ |
| Fast Charging | Red Breathing Effect (Quick)■ |
| PCM(~48k) | Yellow■ |
| PCM(88.2k~192k) | Cyan■ |
| PCM(352.8k~) | Orange■ |
| DSD | White■ |
| MQA | Green■ |
| MQA Studio | Blue■ |
| MQA Core (MQB) | Magenta■ |
4. Start using
First boot
- Press and hold the power button for 2 seconds, the player will enter the power-on state
The first boot time will be longer. - After the boot animation is completed, the system enters the boot setting interface.
- Select the corresponding language
- Select the corresponding time zone
- Complete setup
- First boot completed
Navigation bar
The bottom of the screen is the system navigation bar, which has two modes. 手势导航 and “三按钮”导航, the default is 手势导航。
Users can perform quick operations on the navigation bar through 设置 -》系统 -》 手势 -》 系统导航 Users can switch navigation bar modes.
- Swipe up from the navigation bar: return to the desktop
- Swipe and hover from the navigation bar: enter the task list
- Swipe left or right on the navigation bar: quickly switch to the previous or next APP
- The middle button is the Home key: return to the desktop
- The button on the right is the taskbar key: enter the task list
- The button on the left is the return key: return
NOTE: Changing the display size may cause the left and right button functions of "three-button" navigation to be swapped.
global gestures
- Swipe in from outside the left or right screen: Return
- Three-finger swipe: screenshot
- Double-click the screen: open the screen (this function is turned off by default and needs to be turned on)
设置 -》 系统 -》 手势 -》 双击唤醒)
Main interface
Introduces the related functions of the main interface and some common operations. The main interface contains the desktop and application list. You can enter the application list by swiping up on the desktop.
desktop
-
Status bar at the top
For information about the status bar, please refer to the status bar information description below. -
The middle is the desktop icon area
The desktop area can be used to place items that require quick operations应用图标、微件wait
Long press on a blank area of the desktop to pop up home screen settings, widgets, wallpapers, etc. -
The bottom is the resident shortcut operation
应用图标
Mainly to place some preset high-frequency application shortcuts here to facilitate users to operate quickly. -
Long press a blank area on the desktop to bring up
主屏幕设置、微件、壁纸- Home screen settings: You can set some active behaviors
- Widgets: You can add what you need
微件 - Wallpaper: You can modify the default wallpaper
Application list
- exist
桌面Swipe up with one finger to enter the application list - Long press
应用图标Can call up the menu - Long press
应用图标and move, you can应用图标Add to desktop for quick operation
status bar
Some information in the status bar.
Left side of status bar
-
volume value
Displays the current volume value of the output port. A red volume value indicates that the current volume value is too high. Users need to be careful not to use it at high volumes for a long time, otherwise it may cause hearing damage.
After pulling down the notification bar, click the volume value position to trigger the volume control UI. Under the volume UI, you can adjust the current output volume. -
Class A/Class AB status indication
Indicates whether the current amplification working mode is Class A or Class AB. -
Other notification information Notification information sent by the application used by the user may be folded in the notification bar if there is not enough display space at the current location. The user needs to move down the status bar to release the notification bar.
Right side of status bar
-
Hide other statuses
Display content: a small dot.
Indicates that the status bar has too many statuses to display all of them, and some statuses are hidden. -
Output port status
LineOut
PhoneOut
Balance
Balance LineOut -
Bluetooth status information
Display Bluetooth information, including signal strength, connection status, etc. -
WiFi status information
Display WiFi information, including signal strength, connection status, etc. -
Sampling rate information
The displayed content is the final output sampling rate information. -
Battery level information Displays battery icon, charging status, percentage and other information.
Battery percentage switch: Settings -> Battery -> Battery percentage.
5. Play music
Import local music
Import music via USB
The player supports connecting to a computer via USB and then using the MTP protocol to transfer files. The following is a brief introduction. For more information on the use of MTP, please refer tohere 。
The following is MacOS and Windows Give a brief explanation:
MacOS requires the installation of third-party drivers to use it. The following two methods are available:
app
- Open MTP:https://openmtp.ganeshrvel.com/
- Android official support:https://www.android.com/filetransfer/
Systems after Windows 7 already include the MTP driver and can be used directly.
You can try the following steps:
- Make sure the USB cable connection is normal
- After confirming that the USB cable is connected, pull down USB in the notification bar and select File Storage;
- Restart your computer and try again
- Restart the player and try again
Import music via MicroSD(TF) card
Insert the MicroSD(TF) card into the MicroSD(TF) card slot of the player. The player supports three file formats: FAT32\exFAT\NTFS.
Play local music with Haibei Music
- Open [Haibei Music]
- If you have never scanned songs, it will be displayed as follows. At this time, click [Start Scan] to scan the songs and build a song library.
Scan songs
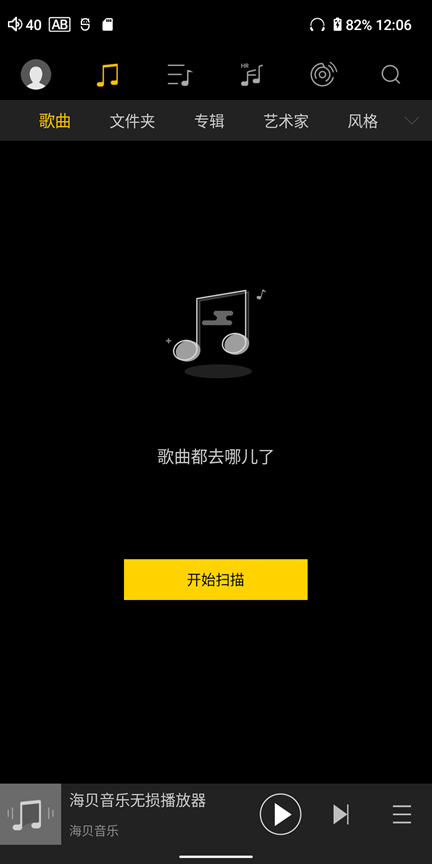
- Just wait for the scan to complete and click on the song to play it.
For more instructions on using Haibei Music, please refer tohere。
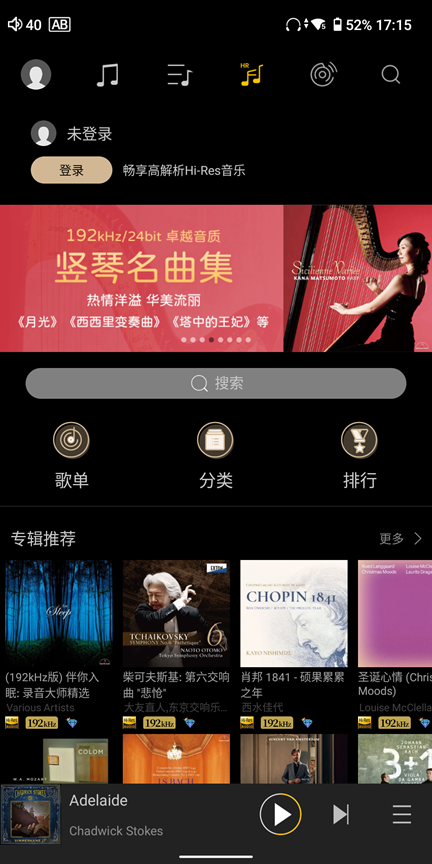
Play streaming music with Haibei Music
- Please make sure you are connected to the Internet
- Open [Haibei Music]
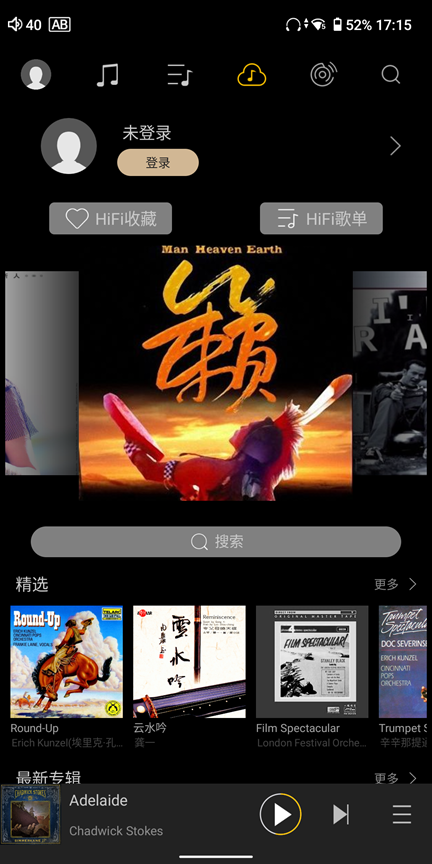
- Click the [Streaming Media] icon on the top menu, and click again to select different streaming media services, such as [Sony Selections] [HiFi Music], and [Tidal] [Qobuz] for other languages.
streaming media
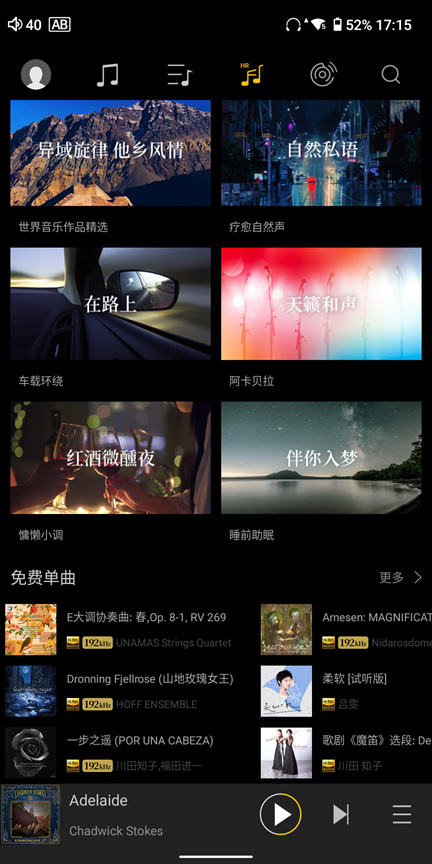
- Select [Sony Selection], there are free trial tracks at the bottom
Sony's selection of free songs
- Select [HiFi Music] and then log in to the account. Users can listen to MP3 format tracks for free.
HiFi music songs
- Select [Tidal] [Qobuz], you need to log in to the account of the corresponding platform, and then use the corresponding service
For more instructions on using Haibei Music, please refer tohere。
6. Settings
WiFi settings
Entrance: Settings -> WLAN -> Turn on WLAN -> it will automatically scan, and then select the corresponding WiFi network connection.
Enter Settings -> WLAN -> Add network -> Advanced options -> Hide network -> Set to "Yes"
Bluetooth settings
Entrance: Settings -> Bluetooth -> Turn on Bluetooth
USB
Entrance: Settings -> USB -> USB working mode
- automatic mode
It can automatically determine whether USB is working in USB OTG mode or device mode based on the inserted peripheral. - OTG mode
Force USB to work in USB OTG mode.
If the peripherals inserted by the user are: U disk, mobile hard disk, USB decoder, USB tail, USB network card and other devices, and the player fails to recognize them, the player can be forced to work in this mode. - device mode
Force USB to work in USB device mode. If the user wants to connect the player to a computer or other host as a peripheral, but the computer or other host fails to recognize it, the player can be forced to work in this mode.
working mode
Entrance: Settings -> Working Mode
Used to change the player's working mode:
-
Android mode
The default working mode of the player. In this mode, you can switch between different third-party software and download and install third-party software just like using an Android phone. -
pure tone mode
Using Hishell Music as the only front-end software, in this mode, users can eliminate other interference factors and listen to music more immersively. -
USB DAC mode
USB DAC mode uses the player as a USB decoder, and users can experience the sound of the player through USB connection.
For specific usage, please clickhere。 -
Bluetooth receiving mode
The Bluetooth receiving mode uses the player as a Bluetooth decoder. Through Bluetooth connection, it can accept Bluetooth music from different mobile phones and experience different sounds from the direct output of the mobile phone.
For specific usage, please clickhere。
Audio settings
-
magnification mode
Choose different amplification modes: Class A, Class AB. -
Turbo mode
Turn Turbo mode on and off to deliver even more thrust. -
Gain
Choose from different gain modes: options are Low, Middle, High, with each level varying by 6dB. -
plug-in
Choose a sound effect plug-in. Different plug-ins provide a different extended audio processing function. -
MSEB
Haibei's unique sound effect setting function provides a more visual description to allow customers to adjust different timbres more intuitively. -
PEQ
The sound effect setting function for more professional users provides more professional sound effect settings, so that customers can adjust the sound to their own needs in a wider range and more independently. -
DSD gain compensation
Since DSD tracks may have a certain attenuation compared to PCM tracks, you can use this to compensate for DSD tracks. -
channel balance
Adjust the volume difference between the left and right channels.
There are differences between the left and right channels of some devices or there are differences between the left and right hearing of some users, which can be adjusted through this. -
maximum volume
Limit the maximum adjustable volume range to avoid volume changes caused by misoperation. -
Volume knob settings
Users can set the direction in which the knob responds to volume adjustment according to their own habits. -
MQA decoding
Because MQA information is encoded in the audio stream, it may cause a delay in identifying MQA information. If the user feels that the MQA audio support for third-party applications is not good (such as Tidal), the MQA decoding function can be turned off. -
Spdif digital volume lock
Lock the Spdif digital signal amplitude. For Spdif decoders that do not support volume adjustment, after unlocking the lock, the volume adjustment function can be realized. -
Lineout digital volume lock
Lock the Lineout digital signal amplitude. After unlocking the lock, you can adjust the LineOut volume. -
USB digital volume lock
Lock the USB audio digital signal amplitude. For USB decoders that do not support volume adjustment, after unlocking the lock, the volume adjustment function can be realized.
Darwin settings
-
Filter mode settings
Selecting different PCM filters can provide different filtering methods for users to choose from. -
DSD filter
Choose different DSD filters. Different filters work differently in different frequency bands. Users can try changing the filters to meet their own preferences. -
NOS switch
DarwinII is still an R2R architecture and can directly use NOS (Non Oversampling), that is, no sampling is done, and the original sampling rate is output directly. Can provide different timbres. -
Atmosphere enhanced
After selecting this option, the audio system enhances the low frequency part. -
Harmonic Controller
After setting this option, the harmonics of the overall audio system will change to a certain extent. The larger the value, the stronger the harmonics. The adjustment of harmonics has a greater impact on strings. -
Joint tuning presets
The timbre jointly adjusted by HiBy RS8 and corresponding products is more suitable for the corresponding combination.
display settings
Entrance: Settings -> Display Settings
Used to change the display-related settings of the player:
-
App icon style
Switch between different App icon styles. The current options are:跟随主题、格调绿金、典雅银灰and原始风格。
原始风格: The overall style is Android native style, and the App icon has not been adjusted. -
Automatically rotate screen
According to the direction detected by the sensor, the direction of the display is adjusted and whether it is horizontal or vertical. -
Lock vertical flip
The fixed display direction is flipped up and down, making it easier for users to connect headphones or USB interfaces from the top. -
Turn on the power light
Power indicator switch, used to turn the indicator light on or off. -
Seashell volume pop-up window
HiBi volume pop-up window switch is used to open and close HiBi's customized volume pop-up window. When closed, the native Android volume pop-up window is used.
Battery settings
Entrance: Settings -> Battery
Used to change battery and power management related settings of the player:
-
Maximum charging capacity
It is used to limit the maximum charging percentage of the battery. It can only be used for power-on charging, and does not take effect during power-off charging. -
battery percentage
Used to switch whether to limit the battery power percentage in the notification bar. -
Idle shutdown
After turning it on, the device will automatically shut down if there is no operation after the set time to save power. -
Scheduled shutdown
After being turned on, the device will automatically shut down after the set time is reached regardless of whether there is any operation to save power.
7. Pre-installed applications
This article introduces some related applications pre-installed in HiBy Player and the functions of these applications. Currently, uninstallation of pre-installed applications is not supported, but some applications can be closed and run.
-
HiBy Music
The player software provided by Haibei, you can check the detailed operation guide.here。 -
HiByCast Server
LAN same-screen control software provided by Haibei. You can check the detailed operation guide.here。
[How to turn off running] Settings -> Applications -> HiByCast -
cool
In domestic application markets with relatively few advertisements, you can download the third-party applications you need in the market.
[How to turn off running] Settings -> Applications -> Coolan App Market -
Google Play
Google App Market allows you to download required third-party applications from the market. [How to turn off running] Settings -> Applications -> Google App Market -
Via
An ultra-lightweight browser that allows you to browse the web. Similar types of applications include: Chrome, Edge, etc.;
8. USB DAC mode
USB DAC Mode Guide
When the player works in USB DAC mode, the player can be regarded as a USB HD decoding receiver or as a USB sound card.
The player working in USB DAC mode supports the USB Audio Class 2.0 (UAC2) protocol, but does not support USB Audio Class 1.0 (UAC1), so the host needs to also support USB Audio Class 2.0 (UAC2).
-
From the top of the player, pull down the notification bar, select [Working Mode], and then select [USB DAC Mode].
-
Enter [Settings]->[Working Mode]->Select [USB DAC Mode] from the desktop icon.
Different host systems will have different power supply, so the USB DAC provides two working modes:
-
USB DAC mode (charging)
After selecting this mode, the current provided by the host is not only used to operate the player, but also charges the player. Therefore, it is recommended to select this mode in scenarios where the host power supply current is large, such as when the host is a computer. -
USB DAC mode (not charging)
After selecting this mode, the current provided by the host is only used for the player's operation. Therefore, it is recommended to choose this mode when the host power supply current is small, for example, when the host is a mobile phone, select this mode.
Different host systems have certain differences in their support for USB Audio Class 2.0 (UAC2). Please confirm the support status according to the corresponding system. For details, please jumphere, the following provides a brief reference:
-
Windows
Windows (Win7/Win8/Win10 versions before 1703) does not support the USB Audio Class 2.0 (UAC2) protocol, so you need to install the driver to use it. For driver installation, please refer tohere。
Windows (Win10 1703 or later) begins to support the USB Audio Class 2.0 (UAC2) protocol, plug and play.
When the computer is powered by an external power supply, it is recommended to use the USB DAC mode (charging).
When the computer is powered by battery, it is recommended to use USB DAC mode (without charging). -
MacOS
MacOS itself already comes with a driver. You can use it by connecting the player to a MacOS computer via a USB cable.
When the computer is powered by an external power supply, it is recommended to use the USB DAC mode (charging).
When the computer is powered by battery, it is recommended to use USB DAC mode (without charging). -
Linux distribution
Linux's support for USB DAC is determined by the kernel. Whether the kernel of different distributions turns on the USB sound card function is uncertain. For Linux distributions that do not support USB DAC, you can compile the kernel yourself to implement the USB sound card function. Or find a third-party application to support USB DAC function.
When the computer is powered by an external power supply, it is recommended to use the USB DAC mode (charging).
When the computer is powered by battery, it is recommended to use USB DAC mode (without charging). -
Android
The Android side distinguishes between exclusive methods and non-exclusive methods.Android non-exclusive use
Simply plug the USB decoder (such as HiBy FC4/HiBy FC6) into the USB port of your phone. If there is no response after plugging it in, you can download HiBy Music and try the exclusive mode of HiBy Music. Otherwise, the phone does not support it. Please contact the phone manufacturer for confirmation.Android exclusive use
Download and install HiByMusic. Enter HiBy Music -> Swipe right to open the settings option -> Settings -> Click on HiBy Music exclusive USB output and open the exclusive output. Insert the USB decoder (such as HiBy FC4/HiBy FC6) directly into the phone. The phone will pop up "Allow HiBy Music to use HiBy FC4", click Allow.It is recommended to use USB DAC mode (without charging) to save power on your mobile phone or tablet.
-
iOS
iOS itself already comes with a driver, and you can use it by connecting the player to your iPhone/iPad via a USB cable.
It is recommended to use USB DAC mode (without charging) to save power on your mobile phone or tablet. -
game console
So far, game consoles such as XBOX/PS/Switch only support USB Audio Class 1.0 (UAC1), so the player's USB DAC function cannot be used through the game console.
9. Bluetooth receiving mode
Bluetooth receiving mode guide
When the player is working in Bluetooth receiving mode, the player can be regarded as a Bluetooth high-definition decoding receiver or as a Bluetooth headset (after connecting the headset).
The player supports codecs such as LDAC/AAC/SBC, so the host must also support codecs such as LDAC/AAC/SBC.
Android phones generally support LDAC/AAC/SBC encoders, while iPhone currently only supports AAC/SBC encoders.
- From the top of the player, go down from the notification bar, select working mode, and then select Bluetooth receiving mode.
- Enter from desktop icon
设置 -》工作模式 -》蓝牙接收模式。
- When switching to Bluetooth receiving mode, the player will automatically enter the pairing state, and when it subsequently enters Bluetooth receiving mode again, it will automatically connect back to the last connected device;
- Turn on Bluetooth on the mobile phone and connect to the searched player device;
- Play songs on mobile phone;
- Exit Bluetooth receiving mode, enter Bluetooth settings, and delete the Bluetooth pairing of the corresponding mobile phone.
- Enter the Bluetooth settings on the mobile phone and delete the Bluetooth pairing of the corresponding player.
10. Frequently Asked Questions
- Frequently asked questions can go hereCheck